Home » Christmas Recipes » Decorated Christmas Tree Cookies with Easy Royal Icing

Decorated Christmas Tree Cookies with Easy Royal Icing

If you’ve ever wanted to make Decorated Christmas Tree Cookies with royal icing, this complete guide walks you through everything, with step-by-step instructions and plenty of tips and tricks. It’s easier than it looks, and you can follow along with the quick decorating video that’s included.

And the best part? You don’t need pro-level baking or decorating skills to make these look amazing. With the right royal icing consistency and a few simple techniques, you’ll get great results with minimal effort.

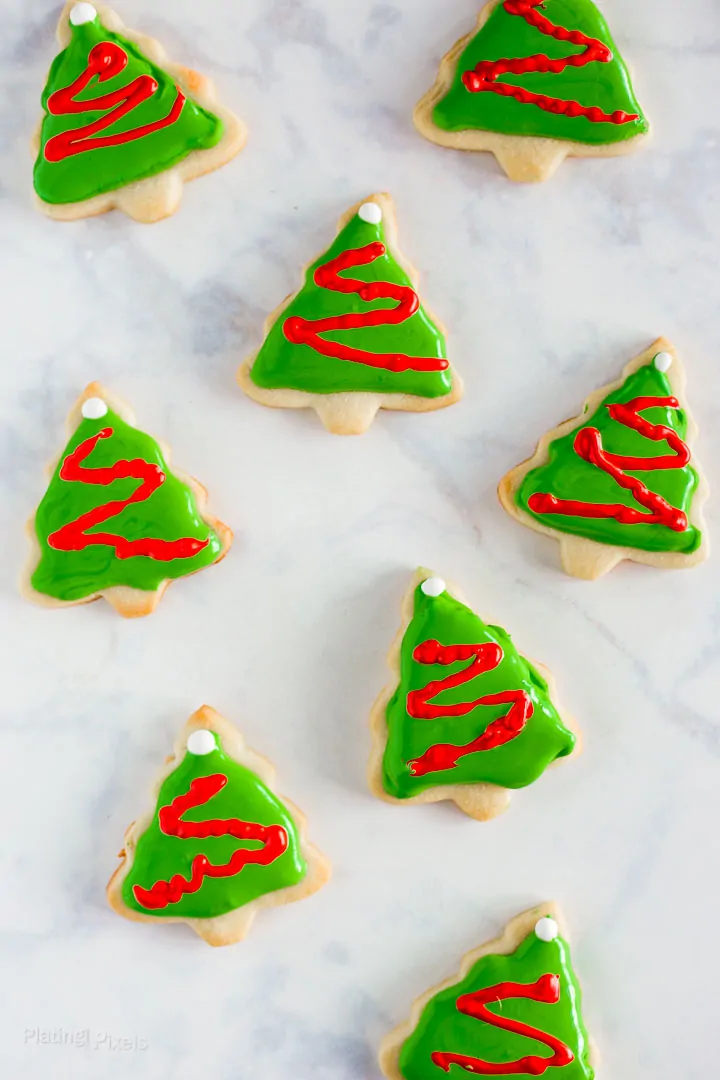
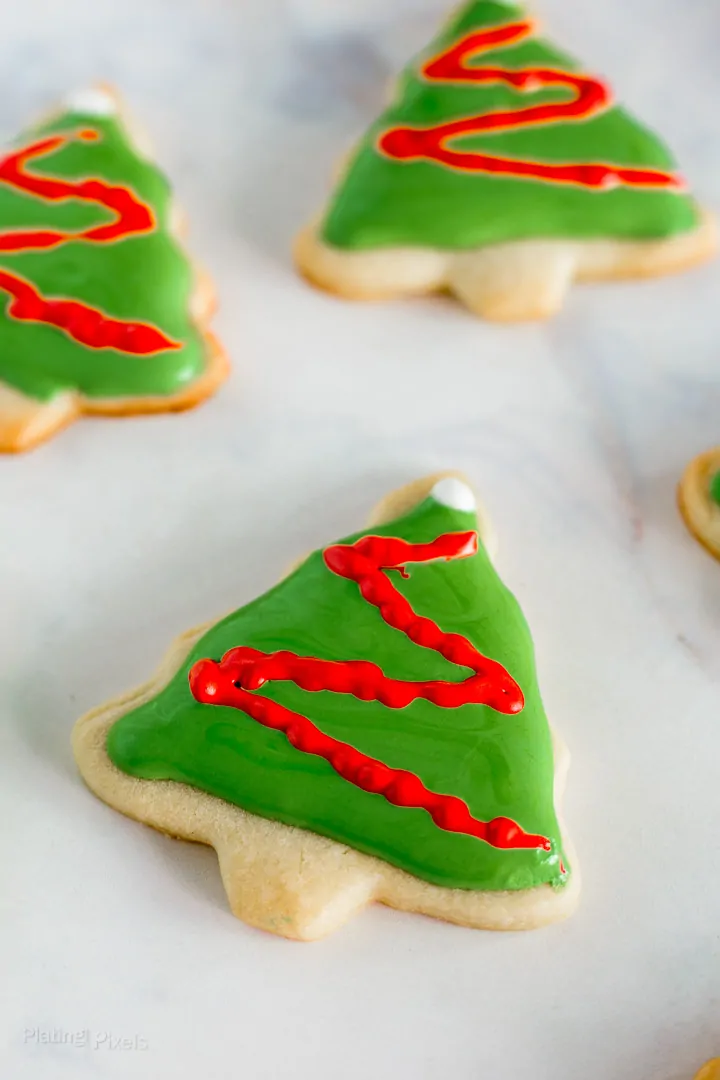
Multiple Decorated Christmas Tree Cookies with Royal Icing on a white background

These Christmas tree cookies pair perfectly with my Fail-Proof Sugar Cookie Recipe, which uses the same dough.

The holidays always bring out my favorite things…cozy music, time with family, a few too many desserts, and the excuse to bake something fun and festive. Christmas-themed treats, like my Peppermint Rice Krispie Treats, Spiced Hot Chocolate Peppermint Cookies, and Peppermint Buttercream Chocolate Cookies are at the top of that list. They’re festive, surprisingly simple, and perfect for gifting or turning into a decorating activity with kids.

Cost-Conscious Recipe
These decorated Christmas tree cookies look bakery-perfect, but at a fraction of the cost of what you’d pay for professionally-iced cookies. Because they use mostly common pantry ingredients for both the cookies and royal icing, it costs only about 25 cents per cookie to make. See the full recipe cost breakdown near the bottom of this post for details.

Why You’ll Love These Decorated Christmas Tree Cookies

  • They look bakery-quality, but are surprisingly simple to make and decorate
  • They are perfect for gifting or holiday cookie exchanges
  • It’s a fun activity for kids or family decorating nights
  • It uses my soft, no-spread sugar cookie base that holds its shape
  • Royal icing dries smooth and firm for easy layering and clean details
  • It’s customizable with sprinkles, colors, and lots of fun design options
  • Works as a great make-ahead option for holiday cookies

Ingredients for Christmas Tree Cookies 

These Christmas Tree Cookies start with my base sugar cookies recipe, then uses a simple royal icing for decorating. Here’s a quick overview of what you’ll need:

  • Sugar cookie dough: A classic dough that bakes into flat, no-spread cookies perfect for decorating. See recipe below for how to make a simple sugar cookie for decorating.
  • Royal icing: Made with powdered sugar, meringue powder, and water. It dries smooth and firm, which is ideal for detailed holiday designs. The recipe below includes the full ingredients and instructions to make an easy royal icing.
  • Gel food coloring: Green works for the main part of the Christmas tree cookies, then add colors like red, white, gold, or silver for ornaments and accents.
  • Piping bags and tips: Small round piping tips help outline and flood the trees.
  • Decorations: Make these extra festive by adding sprinkles, sanding sugar, nonpareils, edible glitter, or star-shaped sprinkles for tree toppers.

Flavor Variations for the Cookie Cut-outs

Try one of these for a fun twist:

  • Almond bakery-style: Add a ¼ teaspoon of almond extract to the dough.
  • Lemon sugar cookies: Replace the vanilla with lemon extract and add some lemon zest.
  • Spiced holiday version: Add a ¼ teaspoon of cinnamon, nutmeg, or cardamom.
  • Chocolate trees: Add 2 tablespoons of dark cocoa powder to the dough.
  • Funfetti trees: Fold in 2 tablespoons of sprinkles into the dough before chilling.
  • Peppermint version: Add a pinch of crushed candy cane on top of wet icing. You can also replace the vanilla extract with peppermint extract for an extra holiday flavor boost.

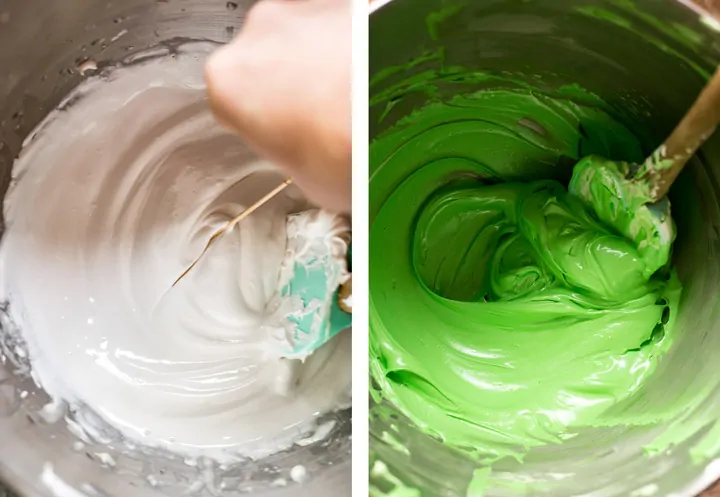
Green royal icing in a mixing bowl

How to Make Royal Icing for Christmas Tree Cookies

These decorated Christmas tree cookies use a simple royal icing for Christmas cookies. Royal icing is what makes decorated Christmas cookies look smooth, crisp, and professional. It’s made to dry firm, so you can layer details, add sprinkles, and stack the cookies without smudging.

Decorating Tools You’ll Need

Royal Icing Instructions

  1. In a large mixing bowl, whisk together: 4 cups powdered sugar,3 tablespoons meringue powder, and ½ teaspoon cream of tartar
  2. Add ½ cup warm water and 1 teaspoon vanilla extract.
  3. With a mixer fitted with the whisk attachment, beat on low until combined, then increase to high and beat 5–8 minutes until the icing forms soft peaks.
  4. Separate into bowls for each color. Leave white as is.
  5. Add gel or paste food coloring a little at a time until you reach your desired color.

Pro Tip: Gels and pastes are more vibrant and won’t thin the icing like liquid colors. Start with small amounts of coloring. Different brands vary dramatically in strength.

Best Royal Icing Consistency

Royal icing should be a thick, smooth glaze.

How to test: Run a toothpick through the icing. A line should form, hold for a second, then slowly melt back into the icing.

How to fix the consistency

  • Too thin: Add powdered sugar, a ¼ cup at a time.
  • Too thick: Add warm water, a ½ teaspoon at a time. Be careful, a tiny bit goes a long way.

Using a toothpick to test royal icing consistency

Flood consistency (for filling the trees)

Create a slightly thinner icing that flows smoothly but doesn’t run off the edges.

Detail consistency (for garlands, ornaments, dots)

Create a thicker icing that pipes clean lines without spreading.

How to Color Royal Icing (Without Over-Thinning It)

  • Gel food coloring: Best for vibrant, clean colors with no texture change.
  • Paste food coloring: Very concentrated for deep shades like a Christmas green.
  • Liquid food coloring: Works ok, but it can thin the icing, so use sparingly.

Pro Tip: Add color with a toothpick or tiny spatula a little at a time, so you don’t accidentally overdo it. You can easily add more coloring, but if you add too much, you’ll have to dilute it with more icing. For the most vibrant green Christmas tree color, I recommend gel or paste food coloring, because they stay bright without thinning the icing.

What Is Meringue Powder and Why Use It

Meringue powder is made from pasteurized egg whites, sugar, and stabilizers. It replaces raw egg whites in royal icing and:

  • Helps the icing whip up quickly
  • Creates a smooth, shiny finish
  • Dries firm for layering details
  • Makes the icing safe and shelf-stable

Where to find Meringue Powder: In the baking aisle, at craft stores, or online.

Decorating Christmas Tree Cookies (Step-by-Step Overview)

Before we get into the icing and designs, you’ll want a solid cookie base. I recently expanded my fail-proof Sugar Cookies Recipe, and that’s the exact dough we’re using here. It makes soft, sturdy cookies that hold their shape beautifully when baked.

Decorating Christmas Tree cookies with royal icing - step two

Follow these steps to create clean outlines, smooth icing, and sharp details.

  1. Bake and cool the cookies: Start with fully cooled cookies so the icing doesn’t melt or spread.
  2. Outline the tree shape: Fill a piping bag fitted with a small round tip and outline each tree cookie. This creates a border that keeps the icing in place.
  3. Flood the inside: Thin your icing slightly, then fill in the outlined area. Use a toothpick or scribe tool to smooth the icing.
  4. Add decorations while wet: Add sprinkles, stars, or sanding sugar before the icing sets.
  5. Dry the base layer: Let the cookies dry for at least 2 hours before adding details.
  6. Pipe additional designs: Add the decorative garland lines or dots using different colors of royal icing.
  7. Dry completely before storing: Let dry for at least 4 hours or overnight before serving to prevent damage to the icing. Royal icing dries hard, keeping the designs sharp and stackable for gifting.

Decorating Christmas Tree cookies with royal icing - step one

Tips for Decorating Christmas Tree Cookies with Royal Icing

  • Keep icing covered: Royal icing dries fast. Keep piping bags covered and bowls sealed with plastic wrap and a damp paper towel.
  • Work in layers: Flood the base first, then let it dry for 2 to 4 hours, before adding garlands, dots, and stars.
  • Pop air bubbles: Use a toothpick or scribe right after flooding to smooth the surface.
  • Add sprinkles early: Decorations stick best while the icing is still slightly wet.
  • Dry completely: Dry overnight to give the icing a smooth, touchable finish and prevent damage to the icing.

Decorating Christmas Tree cookies with royal icing - step three

No Piping Bag or Tips? No Problem

If you don’t have piping bags or tips, you can still decorate like a pro using a Ziploc bag. Here’s how:

  • Spoon the royal icing into a quart-size freezer bag.
  • Push the icing toward one corner and twist the top closed. Be sure that the air is removed from the bag.
  • Snip a tiny hole in the corner. The smaller, the cleaner the lines. Start small, as you can always cut larger. If you make the hole too big, you’ll have to transfer to a new bag.
  • Use it to outline, flood, or dot details on the cookies just like a classic piping bag

Decorating Christmas Tree cookies with royal icing - step four

Tips for the Best Sugar Cookies as a Decorating Base

In my other popular Christmas cookie recipe, I cover how to make the best soft Sugar Cookies for Decorating, but here are some essential tips. 

  • Keep the dough chilled at every stage.
  • Work with small portions and keep the rest in the fridge.
  • Roll the dough evenly to avoid uneven browning.
  • Cut shapes closely to minimize scraps and waste.
  • Freeze the cut-outs 10 to 15 minutes before baking for crisp edges that hold their shape.
  • Bake until edges are just lightly golden.
  • Cool completely before decorating.

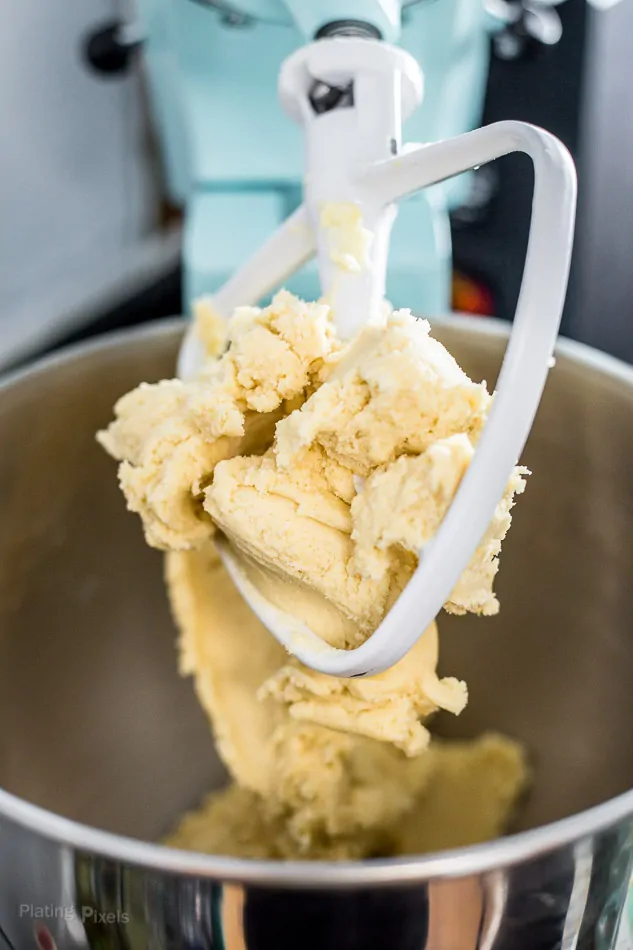
Sugar cookie dough sticking on the paddle of a Kitchen-aid mixer

Why Chilling Matters for Sugar Cookies

Chilling the dough is essential for cut-out cookies that keep their shape. It firms the butter, prevents spreading, and helps the cookies bake into sharp, clean outlines. If your dough softens while rolling or cutting, a quick 5 to 10 minutes back in the fridge helps it firm up.

Freezing the cut-out cookies for 10 to 15 minutes before baking gives even better no-spread results, keeping tree edges crisp for decorating.

Cutting out sugar cookies with Christmas tree shaped cutter

Troubleshooting Christmas Tree Cookies

Below are some common issues that can happen when baking and decorating Christmas Tree cookies, along with simple tips and fixes.

  • Cookies spread or lost their shape: The dough wasn’t chilled long enough, or the cut-outs weren’t frozen before baking.
  • Icing won’t smooth out: The royal icing is too thick. Add a few drops of water and stir again.
  • Colors bleed together: The base layer wasn’t fully dry before adding details, or the icing was too thin.
  • Icing looks dull: It was overmixed or dried too quickly. Try adding ½ teaspoon of corn syrup for shine.
  • Cookies cracked while rolling: The dough was too cold. Let it rest 5 minutes, then roll again.

Close up of decorated Christmas Tree Cookies

Frequently Asked Questions

How do I get royal icing perfectly smooth?

Use flood-consistency icing (around 10–12 seconds). Pipe, flood, then use a toothpick to pop bubbles and smooth the surface.

How long does royal icing take to dry?

  • Flood layer: 3 to 4 hours
  • Piped details: 1 to 2 hours
  • Fully dry for stacking: 6 hours or overnight

Why did my cookies lose their details?

The dough warmed up or wasn’t chilled long enough. To prevent this, freeze the cut-out cookies 10 to 15 minutes before baking.

Can I decorate these without royal icing?

Yes, you can also use buttercream, glaze icing, or melted chocolate.

How do I keep the edges of sugar cookie cut-outs sharp?

Roll to an even thickness, chill the dough thoroughly before cutting, and then freeze the cut-outs before baking.

Make-Ahead and Storage Tips

  • Make ahead: Sugar cookie dough can be made 2 to 3 days in advance and kept chilled as a wrapped disc in the refrigerator.
  • Freezing dough: Wrap tightly and freeze up to 2 months. Thaw overnight in the fridge before rolling.
  • Freezing cut-outs: Freeze the unbaked cut-out shapes for 1 to 2 months in a sealed container. You can bake straight from frozen by adding a few extra minutes to the baking time.
  • Storing the baked cookies: Keep undecorated cookies in an airtight container up to 1 week.
  • Storing the decorated cookies: Once the icing is fully dry, layer cookies between parchment and store sealed at room temperature for up to 5 days.
  • Freezing the decorated cookies: Freeze in airtight containers for up to 2 months. Thaw uncovered so condensation doesn’t affect the icing.

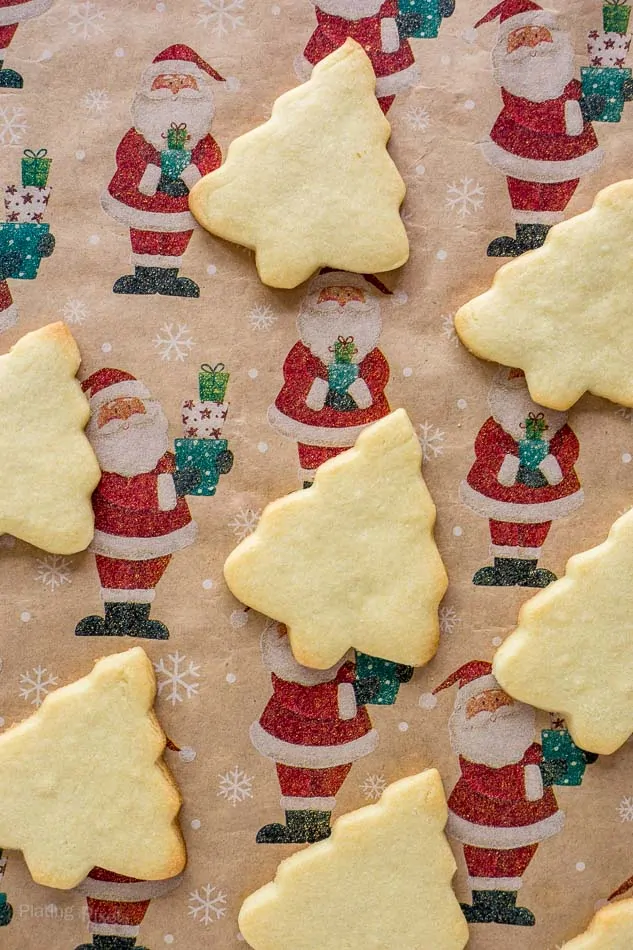
Christmas Tree cookies next a Santa-themed background

More Christmas Dessert Recipes

If you want to learn how to decorate more Christmas cookies, explore my Ultimate Decorated Christmas Cookies Guide for more recipes, inspiration, and tips.

More Holiday-Themed Cookie Recipes

Recipe Cost Breakdown

Total estimated recipe cost: $4.81

Cost per serving (20 decorated cookies): ~$0.24 each

Comparable bakery decorated cookie: ~$2.50 each

Toggle Full Ingredient Cost Breakdown
IngredientAmount UsedEstimated Cost
Granulated sugar1 cup$0.28
Unsalted butter½ cup (1 stick)$0.60
Egg1 large$0.25
Lemon or vanilla extract½ tsp$0.33
All-purpose flour2 cups$0.14
Powdered sugar4 cups$1.00
Meringue powder3 Tbsp$1.10
Cream of tartar½ tsp$0.05
Vanilla extract1 tsp$0.66
Food coloring (gel)Small amounts$0.40
Total$4.81

Based on actual amount of ingredients used and U.S. national average grocery prices as of 2026. Actual costs may vary by region or store.

Decorated Christmas Tree Cookies with Royal Icing on a white background

Decorated Christmas Tree Cookies with Royal Icing

Written by Matt | Plating Pixels
Adorable Christmas Tree Cookies with soft centers and crisp edges, decorated with royal icing. A fun, easy holiday cookie everyone will love.
Recipe Cost: $4.81 | Cost Per Cookie: ~$0.24 each
5 from 6 votes
Prep Time 30 minutes
Cook Time 10 minutes
Chilling 1 hour 15 minutes
Total Time 40 minutes
Course Dessert
Cuisine American
Servings 20 cookies
Calories 222 kcal

Equipment

Ingredients
  

Sugar Cookies

  • 1 cup granulated sugar
  • ½ cup (1 stick) unsalted butter room temp
  • teaspoon salt
  • 1 large egg
  • ½ teaspoon vanilla extract
  • 2 cups all-purpose flour sifted

Royal Icing

Instructions
 

Sugar Cookies

  • For full instructions and lots of tips for making perfect cut-out cookies, refer to my fail-proof Sugar Cookies Recipe. You'll want to bake these at least a couple of hours ahead of time, or the day before decorating, to be sure they fully cool.

How to Make Royal Icing

  • In a large hand or stand mixing bowl stir together powdered sugar, meringue powder and cream of tartar.
  • Add warm water and vanilla. Using a hand or stand mixer fitted with the whisk attachment, beat on low until combined,
  • Increase the mixer to high and beat 5 to 8 minutes more, until the icing forms soft peaks that settle. See the notes section for details on consistency.
  • Separate the icing into separate bowls for the desired colors. White can be used as is. You’ll need to reserve more for the green icing.
  • For the green icing, add food coloring, a small amount at a time, until you reach the desired shade. Repeat for the other colors.

How to Decorate Christmas Tree Cookies

  • Transfer each icing color to a piping bag fitted with a small round tip (or use a Ziploc bag with a tiny corner cut).
  • Outline the tree shape with green icing, leaving a small margin around the edge.
  • Flood the inside with slightly thinned green icing, using a toothpick to smooth the surface if needed.
  • Let the base dry for 2 to 4 hours
  • Add zig-zag garland lines with red icing, then pipe dots, ornaments, or stars with white, yellow, or other colors.
  • Allow decorated cookies to dry at room temperature for 4 to 6 hours (or overnight) before stacking or storing.

Notes

Correct consistency: Royal icing should be a thick glaze. Run a toothpick through it — the line should appear, hold for a moment, then slowly flatten back out.
  • If it disappears instantly, it’s too thin.
  • If it doesn’t settle at all, it’s too thick.
If icing is too thin: Stir in powdered sugar, ¼ cup at a time, until it thickens.
If icing is too thick: Add warm water, ½ teaspoon at a time — a tiny bit goes a long way.
Coloring: Different food colorings (paste, gel, liquid) vary in strength. Add a little at a time or follow package guidance if using highly concentrated brands.
Prevent drying out: Royal icing dries quickly. Keep filled piping bags covered, and clear dried icing at the tip with a toothpick if needed.
For leftover icing: Cover the bowl with a damp paper towel, then seal tightly with plastic wrap to prevent crusting.
Make ahead: Icing can be made up to 48 hours in advance. Store as directed above in the fridge. Bring to room temp and stir before using.
Recipe time does not include icing drying time, which is about 3 hours.
Nutrition Facts
Decorated Christmas Tree Cookies with Royal Icing
Serving Size
 
1 cookie
Amount per Serving
Calories
222
% Daily Value*
Fat
 
4
g
6
%
Saturated Fat
 
3
g
19
%
Cholesterol
 
21
mg
7
%
Sodium
 
19
mg
1
%
Potassium
 
29
mg
1
%
Carbohydrates
 
43
g
14
%
Fiber
 
0
g
0
%
Sugar
 
33
g
37
%
Protein
 
1
g
2
%
Vitamin A
 
155
IU
3
%
Calcium
 
5
mg
1
%
Iron
 
0.6
mg
3
%
* Percent Daily Values are based on a 2000 calorie diet.
Keyword christmas cookie decorating, Christmas cookies, christmas sugar cookie recipe, Christmas tree cookies, cut-out christmas cookies, decorated Christmas cookies, easy christmas cookies, festive holiday cookies, holiday sugar cookies, iced sugar cookies, royal icing sugar cookies
Tried this recipe?Let us know how it was!
Decorated Christmas Tree Cookies with Easy Royal Icing
Christmas Recipes | Dessert Recipes | Recipes | Vegetarian

Similar Posts

12 Comments

  1. 5 stars
    I’m terrible at baking and always worried about frosting stuff, but these were so fun and easy! Even got my kids to help me!

  2. 5 stars
    Refrigerating the icing before using it is a game changer for gingerbread house decorating! No more using it quick before it dries out – thank you for the tip!

  3. 5 stars
    You did amazing decorating the cookies. I am always in awe of how creative people can be with food. I love the christmas spirit as well.

  4. 5 stars
    These Christmas tree cookies look perfect! Thanks for sharing your tips! These will be a beautiful addition to the Christmas cookie platter!

    1. You’re welcome and thanks Taylor. A platter isn’t a bad idea and sounds like I should bake some more of these soon!

  5. 5 stars
    What a beautiful detailed post that is so going to be handy during this season. Loved your Christmas tree cookies and all the tips. Will be referring to it for sure.

  6. 5 stars
    I really appreciate how detailed these instructions are. And the cookies are adorable. I like a small Christmas cookie, myself. That way you can try lots of little ones.

Leave a Reply

Your email address will not be published. Required fields are marked *

Recipe Rating